Gatsby GraphQL
Intro
GraphQL is an API query language. This is a key part of a Gatsby project because one of the key elements of JAMstack is the ability to pull in the actual data or contents of a website from an outside source via API’s. GraphQL is how we connect to that data.
GraphiQL
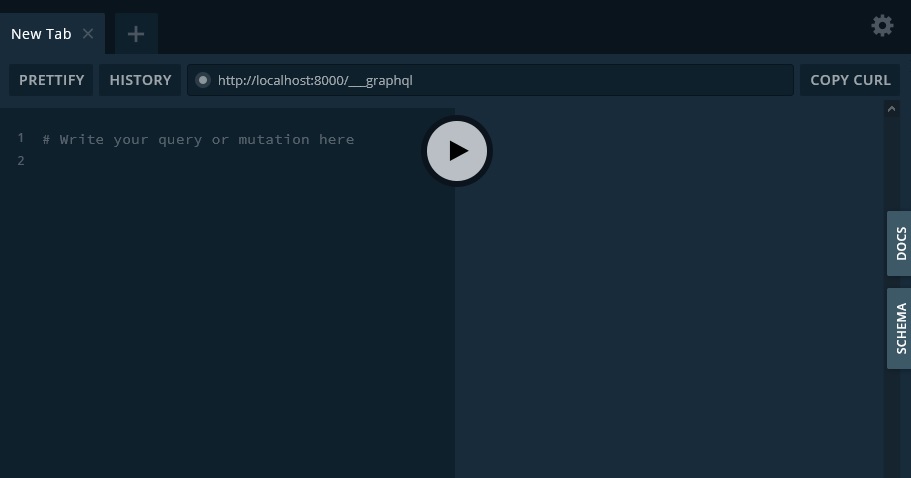
There is a convenient visual tool built into GraphQL that can be accessed when your server is in development mode. You can access GraphiQL by navigating to this local URL.
http://localhost:8000/___graphql
Your console will also show you a link to this when you run gatsby develop.
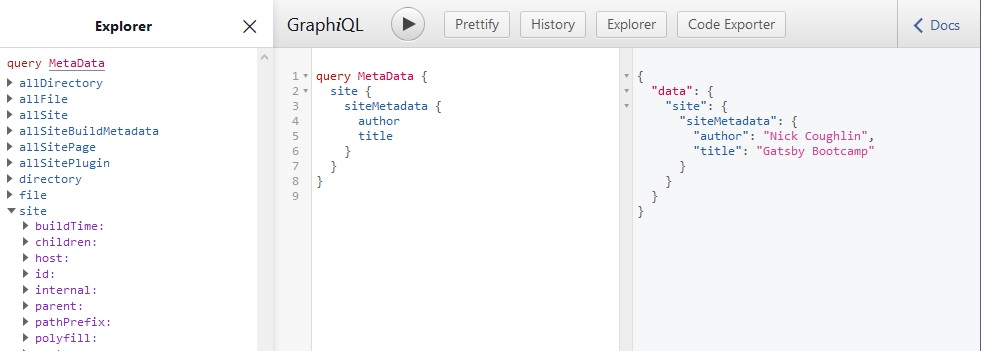
Using this tool you can visually navigate the structure of API that you are connected to and construct queries, name them, and then reference those queries later. To keep it simple we can start by accessing our local API.
To start let’s go into our gatsby-config.js file and add some site meta data.
/**
 * Configure your Gatsby site with this file.
 *
 * See: https://www.gatsbyjs.org/docs/gatsby-config/
 */

module.exports = {
  siteMetadata: {
    title: 'Gatsby Bootcamp',
    author: 'Nick Coughlin'
  },
  plugins: [
    'gatsby-plugin-sass'
  ],
}
We can then visually navigate to our site metadata using GraphiQL and construct a query to retrieve this information. I named this query MetaData.
Dynamic Content From API
We’ve got a decent idea of how to construct a query with GraphQL now (so easy, honestly… wow). The next step is to use the data that the query returns to dynamically populate content in our components. AKA we need to get that info on the page.
Let’s take a look at my header.js component which currently has my name at the top.
import React from "react"
import { Link } from "gatsby"

import headerStyles from "./header.module.scss"

const Header = () => {
  return (
    <header className={headerStyles.header}>
      <h1>
        <Link to="/" className={headerStyles.title}>
          Nick Coughlin
        </Link>
      </h1>
      <nav>
        <ul className={headerStyles.navList} >
          <li>
            <Link to="/" className={headerStyles.navItem} activeClassName={headerStyles.activeNavItem}>
              Home
            </Link>
          </li>
          <li>
            <Link to="/about" className={headerStyles.navItem} activeClassName={headerStyles.activeNavItem}>
              About
            </Link>
          </li>
          <li>
            <Link to="/contact" className={headerStyles.navItem} activeClassName={headerStyles.activeNavItem}>
              Contact
            </Link>
          </li>
          <li>
            <Link to="/blog" className={headerStyles.navItem} activeClassName={headerStyles.activeNavItem}>
              Blog
            </Link>
          </li>
        </ul>
      </nav>
    </header>
  )
}

export default Header
Obviously that name is hard coded in. Now let’s change that by pulling in my name dynamically from the MetaData query that we constructed.
Import GraphQL Components
The first step is to import some GraphQL components from Gatsby into our header component like so.
import { Link, graphql, useStaticQuery } from "gatsby"`
Construct Data Variable
Next inside of our component we create a new variable to store the data that we want to retrieve and we can just call it data.
const data = useStaticQuery(graphql``)
and oh my god what is that syntax… graphql``. See Tagged Template Literal just below for explanation.
Then we just copy and paste our query that we constructed using GraphiQL into this tagged template literal and will have access to that data.
const data = useStaticQuery(graphql`
    query {
      site {
        siteMetadata {
          title
        }
      }
    }
  `)
Tagged Template Literal
Just a side note, this is called a Tagged Template Literal, and it is essentially saying that the template literal string is going to be evaluated by the function graphql and then returned. You can read more about it in the MDN docs; or somewhere else, it’s your life.
Rendering Data From Variable
Like all variables in React, we render them with so if we want to render the site title we would use {data.site.siteMetadata.title}

and here it is all together.
import React from "react"
import { Link, graphql, useStaticQuery } from "gatsby"

import headerStyles from "./header.module.scss"

const Header = () => {
  const data = useStaticQuery(graphql`
    query  {
      site {
        siteMetadata {
          title
        }
      }
    }
  `)

  return (
    <header className={headerStyles.header}>
      <h1>
        <Link to="/" className={headerStyles.title}>
          {data.site.siteMetadata.title}
        </Link>
      </h1>
      <nav>
        <ul className={headerStyles.navList}>
          <li>
            <Link
              to="/"
              className={headerStyles.navItem}
              activeClassName={headerStyles.activeNavItem}
            >
              Home
            </Link>
          </li>
          <li>
            <Link
              to="/about"
              className={headerStyles.navItem}
              activeClassName={headerStyles.activeNavItem}
            >
              About
            </Link>
          </li>
          <li>
            <Link
              to="/contact"
              className={headerStyles.navItem}
              activeClassName={headerStyles.activeNavItem}
            >
              Contact
            </Link>
          </li>
          <li>
            <Link
              to="/blog"
              className={headerStyles.navItem}
              activeClassName={headerStyles.activeNavItem}
            >
              Blog
            </Link>
          </li>
        </ul>
      </nav>
    </header>
  )
}

export default Header
Example 2: Footer Author
Just as a quick second example we can use this same method to put the author in the footer dynamically.
Here is a footer component
import React from 'react';
import { graphql, useStaticQuery } from "gatsby";

const Footer = () => {
    const data = useStaticQuery(graphql`
    query {
      site {
        siteMetadata {
          author
        }
      }
    }
  `)
    return (
        <footer>
           <p> Made with ☕ by {data.site.siteMetadata.author}</p>
        </footer>
    );
}

export default Footer;

GraphQL Playground
There is an alternative GraphQL IDE that is available called GraphQL Playground. It is a more modern IDE with more features and it is recommended. To enable playground create a new .env.develop file in your root and add the following to it.
GATSBY_GRAGHQL_IDE=playground
then install a new package called env-cmd.
npm install --save-dev env-cmd
The –save-dev installs all the dependencies on the dev server only, which is the only place we require them.
Then go to your package.json file and modify the develop script to the following
"develop": "env-cmd .env.development gatsby develop",
** Note that to start the development server now instead of using gatsby develop you would now use npm run develop.
** Note 2: These instructions now appear to be outdated, but these instructions on the Gatsby Docs are currently working: Using the GraphQL Playground
GitHub Repo
Automated Amazon Reports
Automatically download Amazon Seller and Advertising reports to a private database. View beautiful, on demand, exportable performance reports.