The Beginners Guide to Grunt

Note that all these instructions are based on a Windows 7 (x64) OS. I am using the cmder console emulator so my console is more functional. This should all work with the normal CLI though.
What is Grunt
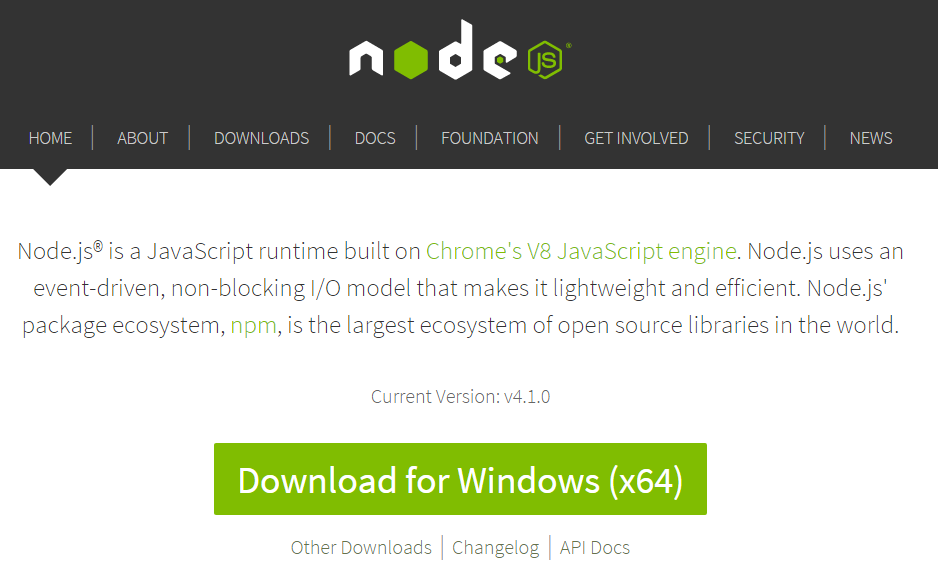
Grunt is a Javascript program that runs on your Operating System instead of in your browser. It is able to run on your OS thanks to the Javascript runtime environment Node.js which is based on the Google Chrome Javascript engine.
What does Grunt do
Grunt automates lots of common web design tasks, such as combining several Javascript files into one (also known as concatenating), which will speed up your website since the server will have to request fewer files. Grunt will also compress and minify your CSS and Javascript, which will reduce your file sizes. It can also optimize your images, and do hundreds of other useful things. But the basic answer is that it will help you make your site faster, and automate the processes for doing so. Grunt is commonly used by professional web developers.
Getting Started With GRUNT
Since GRUNT is a Javascript program, you will need to install the Javascript runtime environment Node.js before you can start working with Grunt. Node is installed with a simple .exe after you download it from their website.
Create Your Project File
The next step would be to create a project file for the website you will be building. For this project we will be working on a site called AidMap. Which I have placed in a websites folder on my harddrive.
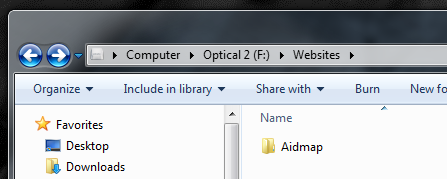
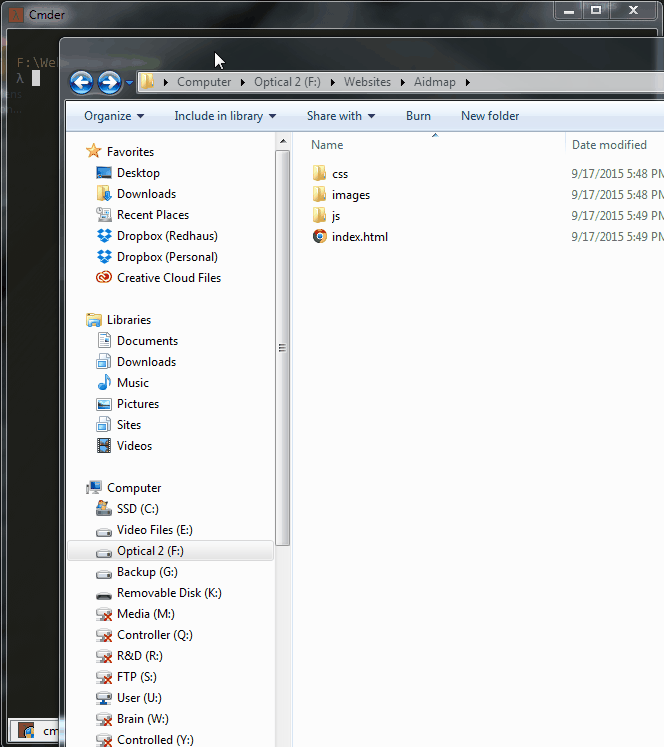
and inside this folder we will place the usual folders for our images, css, javascript and our .html file. These are all blank for now.

Next you will install Grunt inside your project folder. That’s because Grunt is installed into each project, not just onto your computer. You will install Grunt into every project file that you use it on. First you will install the Grunt-CLI, which will give us the Grunt commands in our Command Line Interface.
Installing the Grunt Command Line Interface
Before you install Grunt into your project, you will install the Grunt CLI. This will give you the basic commands to run the copy of Grunt which is installed in your project files. The CLI commands will load the local installation of the Grunt library, apply the configuration from the Gruntfile, and execute any tasks you’ve assigned it to run.
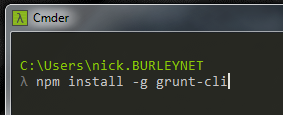
To install the Grunt CLI you simply open the Windows CLI and type:
npm install -g grunt-cli
NPM indicates the Node.js Package Manager, install obviously tells it to install and -g tells it to install globally. This makes it accessible from your environment without having to install it for each package you use. Once that is done the grunt CLI commands will now work in the command line. More on that here NPM Docs: CLI.
To verify that the Grunt CLI has installed correctly. Just type Grunt.
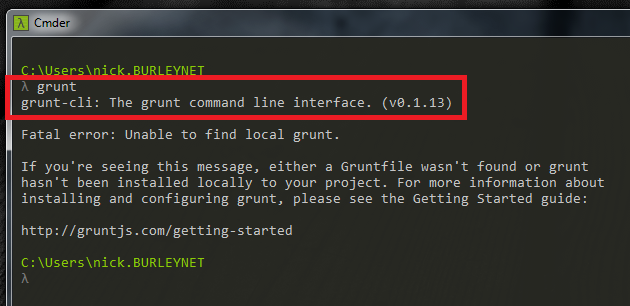
The return shows that the grunt-cli has been successfully installed globally, and we can see the version of the software displayed. The error that you see underneath does not mean that you have failed, it just means that we haven’t installed grunt into our project yet, and that it can’t find the project file.
Installing Grunt Manually In Project
To install Grunt into a project, you will add two files to the project folder.
- package.json
- Gruntfile.js
Package.json
is used by npm to store metadata for projects published as npm modules. You will list Grunt and the Grunt plugins your project needs as devDependencies in this file.
Gruntfile
is named Gruntfile.js and is used to configure or define tasks and load Grunt plugins.
The following instructions between the horizontal lines I am pulling pretty much directly from the Grunt website.
The package.json file belongs in the root directory of your project, next to the Gruntfile, and should be committed with your project source. Running npm install in the same folder as a package.json file will install the correct version of each dependency listed therein.
There are a few ways to create a package.json file for your project:
- Most grunt-init templates will automatically create a project-specific
package.jsonfile. - The npm init command will create a basic
package.jsonfile. - Start with the example below, and expand as needed, following this specification.
{
  "name": "my-project-name",
  "version": "0.1.0",
  "devDependencies": {
    "grunt": "~0.4.5",
    "grunt-contrib-jshint": "~0.10.0",
    "grunt-contrib-nodeunit": "~0.4.1",
    "grunt-contrib-uglify": "~0.5.0"
  }
}
This GIF shows how to create a basic package.json file using the npm init command:
Installing Grunt and gruntplugins
The easiest way to add Grunt and gruntplugins to an existing package.json is with the command:
npm install <module> --save-dev
Not only will this install <module> locally, but it will automatically be added to the devDependencies section, using a tilde version range.
For example, this will install the latest version of Grunt in your project folder, adding it to your devDependencies:
npm install grunt --save-dev
The same can be done for gruntplugins and other node modules. As seen in the following example installing the JSHint task module:
npm install grunt-contrib-jshint --save-dev
Checkout the current available gruntplugins to be installed and used on your project at the plugins page.
Be sure to commit the updated package.json file with your project when you’re done!
What that all really means is that, when you use the command:
npm install grunt --save-dev
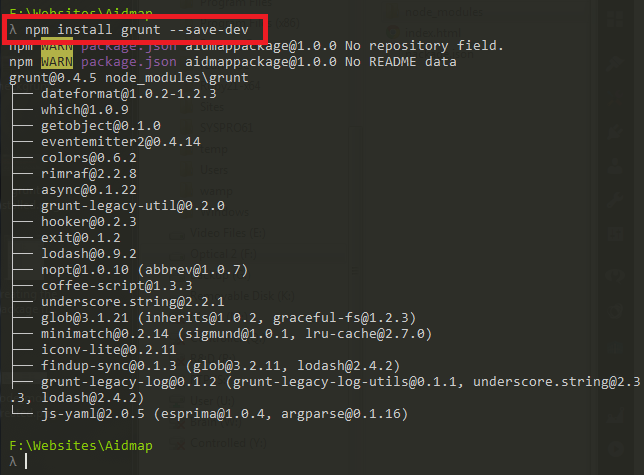
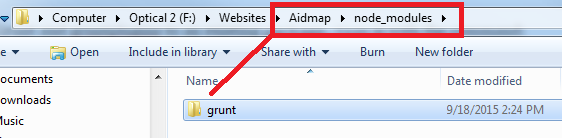
Two things will happen. The first is that a node_modules folder will be created in your project file.

And inside that node_modules folder will be your grunt files. This makes sense, since you have just installed Grunt as a module using the Node Package Manager.
The second thing that will happen is that grunt will now be added as a dependency in your package.json file automatically!

So next we can try installing a grunt module for practice, since the modules are the whole point of using grunt in the first place! Lets try installing the jshint module, which validates files, and is the 4th most popular module on gruntjs.com/plugins
We start by entering into the console:
npm install grunt-contrib-jshint --save-dev
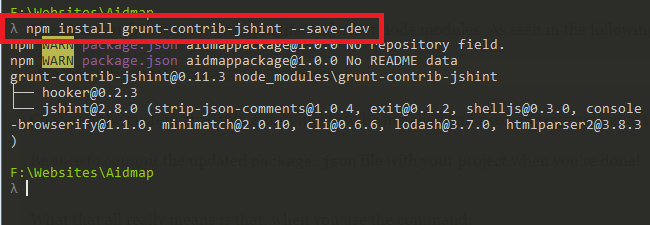
And we can see that jshint has been installed into our node modules folder, and should also be listed as a dependency now in our package.json file. Let’s check.
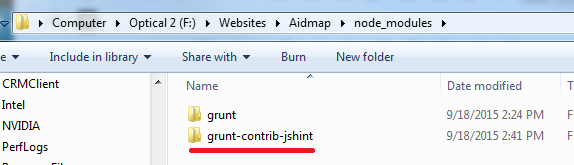
and the jshint dependency was successfully placed in the package.json folder. So success!
The last thing is…
The Gruntfile
The Gruntfile.js is the Grunt configuration file where you actually tell Grunt what to do.
The Gruntfile.js is the second file that we will be placing in our projects index, next to the package.json file. The Gruntfile should also be committed with the rest of the project source.
A Gruntfile consists of 4 parts
- The “Wrapper” function.
- Project and task configuration
- Loading Grunt plugins and tasks.
- Custom tasks
Here is a sample Gruntfile taken from the grunt website:
module.exports = function(grunt) {

  // Project configuration.
  grunt.initConfig({
    pkg: grunt.file.readJSON('package.json'),

    uglify: {
  // Configuration for uglify goes here
      options: {
        banner: '/*! <%= pkg.name %> <%= grunt.template.today("yyyy-mm-dd") %> */\n'
      },
      build: {
        src: 'src/<%= pkg.name %>.js',
        dest: 'build/<%= pkg.name %>.min.js'
      }
    }
  });

  // Load the plugin that provides the "uglify" task.
  grunt.loadNpmTasks('grunt-contrib-uglify');

  // This tells grunt what we want it to do for the default tasks. Default tasks run when you type grunt in the console.
  grunt.registerTask('default', ['uglify']);

};
Now lets break this down into it’s individual components to better understand it.
1. The “Wrapper” function
module.exports = function(grunt) {

  // Grunt related things go here.

};
Every Gruntfile.js follows this format, and the Grunt code must be nested inside this function.
2. Project and Task Configuration
Once a Grunt plugin has been installed you will need to configure the plugin to tell it what to do in your project. Every plugin has a readme file (and also instructions on the grunt website) that will explain how to configure that particular plugin. In the example below we are configuring the Grunt plugin “uglify’. Uglify’s job is to minify files. Therefore it needs to know what files to minify, and where to output the minified file when it is done. Under the “build” line you tell it the source files that it will minify, and then the destination file, which will be created when the plugin is run.
Since our project doesn’t have any javascript files to minify yet, this is just a hypothetical example. In this sample our javascript source files would be in a subfolder titled “src” and the output would be into another subfolder titled “build”. Another common name for this folder would be “dist” for “distribution”.
// Project configuration.
grunt.initConfig({
  pkg: grunt.file.readJSON('package.json'),
  uglify: {
    options: {
      banner: '/*! <%= pkg.name %> <%= grunt.template.today("yyyy-mm-dd") %> */\n'
    },
    build: {
      src: 'src/<%= pkg.name %>.js',
      dest: 'build/<%= pkg.name %>.min.js'
    }
  }
});
3. Loading Grunt plugins and tasks
This part is simple, it just loads the plugin that you configured above.
// Load the plugin that provides the "uglify" task.
  grunt.loadNpmTasks('grunt-contrib-uglify');
4. Custom Tasks
This string tells Grunt what to run as a default task (‘grunt’ command). You can also define custom tasks after that.
// This tells grunt what we want it to do for the default tasks. Default tasks run when you type grunt in the console.
grunt.registerTask('default', ['uglify']);
Further information on creating and configuring tasks can be found in these places:
Resources
Getting Started (official grunt site)
Grunt for People Who Think Things Like Grunt are Weird and Hard
Automated Amazon Reports
Automatically download Amazon Seller and Advertising reports to a private database. View beautiful, on demand, exportable performance reports.