AWS Cognito Notes
Intro
I'm convinced at this point that AWS has some sort of internal rule that their documentation should be intentionally vague and never include actual code samples. The goal here is to provide a more clear overview of how Cognito actually works, and provide actual detailed code examples for receiving and exchanging tokens.
We will not be using Amplify here.
Hosted UI Flow
When the user is signing in you can either have them use a custom form that is linked to Cognito on the back end using the Cognito SDK, or you can use the hosted UI, where the registration, login, password reset forms are all handled for you. We will look at the process of using the hosted UI here.
there is actually a third option where you can use Amplify prebuilt components but we aren't using Amplify as it limits flexibility
Let us start with the user signing in using the hosted UI.

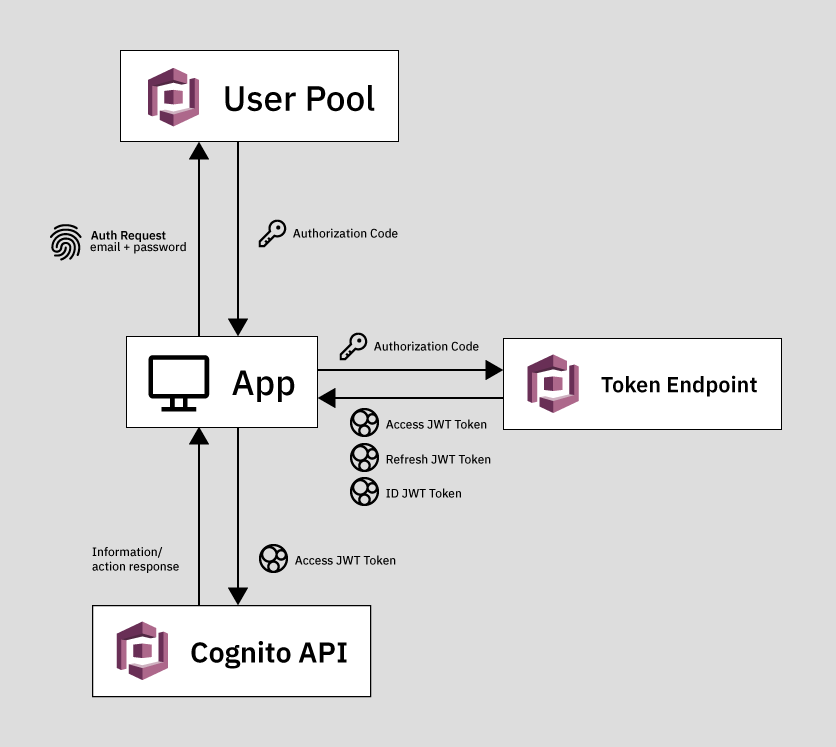
The user submits their email and password to the User Pool, which then authenticates the user and sends back either a JWT Token or Authorization Code.
Response from User Pool
The User Pool will return to us one of the following:
- Authorization Code (OAuth Code)
- Implicit Grant token
The response type is chosen by you in your User Pool settings at App Integration > App client settings > OAuth 2.0.

You can also enable both methods and then specify which one you want to use by changing the URL of the hosted UI.
The response will be inserted into the URL as a query parameter when you are redirected after a successful user authentication with the User Pool. See just below for examples.
Authorization Code
The authorization code grant method returns an authorization code.

Here is an example of an Authorization code returned in a URL after using the hosted UI.
https://app.widget.io/?code=0162d843-cd07-4e34-9594-d4bdc91bd270
This code must be exchanged with Cognito to receive JWT Tokens, which are then used to access the Cognito API.
The Code Grant method is the preferred method as it is much more secure. It does not pass any JWT Tokens directly to the client, potentially exposing them.
Implicit Grant JWT Token
The implicit grant method returns an ID token directly.

Here is an example of an implicit grant JWT Token returned in the url.
Format sample from documentation:
https://www.example.com/#id_token=123456789tokens123456789&expires_in=3600&token_type=Bearer
actual returned token:
https://app.widget.io/#id_token=eyJraWQiOiJ0T2ljeHUxZGhGVkt5ZHl0K2ZqbVowSXF1NHRJa1ZUWEJ5MWRSRnRPVnU4PSIsImFsZyI6IlJTMjU2In0.eyJhdF9oYXNoIjoiSVhmWUNTYjhVekRjN0U0X1gzTTlGZyIsInN1YiI6IjY0ZWE4OWFiLTU3NWYtNGJhNC1iMGE2LTNiMGJmOTAyNWQxZCIsImF1ZCI6IjFxNW84OGI2ZW5rdjMwdTZnYnZhdWV1bWI4IiwiZW1haWxfdmVyaWZpZWQiOnRydWUsImV2ZW50X2lkIjoiN2ExMGQ4YmQtNWI2Zi00OGM0LTk1MTUtYjVkOWE3N2IwNjA3IiwidG9rZW5fdXNlIjoiaWQiLCJhdXRoX3RpbWUiOjE2MTc5ODI2MzYsImlzcyI6Imh0dHBzOlwvXC9jb2duaXRvLWlkcC51cy1lYXN0LTEuYW1hem9uYXdzLmNvbVwvdXMtZWFzdC0xX1cxWE5MTkhOWCIsImNvZ25pdG86dXNlcm5hbWUiOiJuY291Z2hsaW4iLCJleHAiOjE2MTc5ODYyMzYsImlhdCI6MTYxNzk4MjYzNiwiZW1haWwiOiJjb3VnaGxpbi5uaWNob2xhc0BnbWFpbC5jb20ifQ.GUvRcyol8zpOEni8VqUjJLNfPchqfNw0xKUcVAEicwIUpHGqMNQYGddY8gNFp1web4fW8LCwOQOLkHpFeruhkHV3z8ek5vx0cTctAsPgVspUG0faiAn-5zxNbI-MfiLppKFCkU3n2EZhntEWAzBybOQQRbrTV7rZ_jygkIoLtI4Xr-RwaTanXd9tsHJ0pTqvtTXOWLsnXwBF0U5z-DK4XlQeRvnhDAILvq63t52Ne2RFhojTIPu82GsATpV4qHhiB120BcyF85TJbturJ7qlF7QD3SRlzhIF0A1DU5O5EseELIWc9GH_bIG2DVxKImy_Bx3ucsQ601zAJWODEVm3RA&access_token=eyJraWQiOiJyeit0d0t3YThEUURZaEYzYmVTYTR2VUhsMktGTFRRcnJ6VklcL3Bxd3M4ST0iLCJhbGciOiJSUzI1NiJ9.eyJzdWIiOiI2NGVhODlhYi01NzVmLTRiYTQtYjBhNi0zYjBiZjkwMjVkMWQiLCJldmVudF9pZCI6IjdhMTBkOGJkLTViNmYtNDhjNC05NTE1LWI1ZDlhNzdiMDYwNyIsInRva2VuX3VzZSI6ImFjY2VzcyIsInNjb3BlIjoib3BlbmlkIGVtYWlsIiwiYXV0aF90aW1lIjoxNjE3OTgyNjM2LCJpc3MiOiJodHRwczpcL1wvY29nbml0by1pZHAudXMtZWFzdC0xLmFtYXpvbmF3cy5jb21cL3VzLWVhc3QtMV9XMVhOTE5ITlgiLCJleHAiOjE2MTc5ODYyMzYsImlhdCI6MTYxNzk4MjYzNiwidmVyc2lvbiI6MiwianRpIjoiYTkyZmNhODgtZjMyNi00YTFjLWFhNGQtYWFhYTA4MzdjMjNiIiwiY2xpZW50X2lkIjoiMXE1bzg4YjZlbmt2MzB1NmdidmF1ZXVtYjgiLCJ1c2VybmFtZSI6Im5jb3VnaGxpbiJ9.Oe8QvsLg1YQ0TLdKCcCWL-fXNXUXUcyh1UYCLvtgOlj7tGUF-4xBli3npcRxlra9WQN8qGDp4BK3ao8DIyVnm3U0ar2GVbyobUOiVWtzb0YUFmjFgUvw_Da3M6F7ok0whxVu58HXM1LhNY_HpKU6WRO37V63ac891KQieFqzkp1BkqdEvZPvhET6ZR3gBplp0L-MwUZSulQk-5g9rXfIpXQz4LggwIhKrAFfe1JeUAtKd62Uk2EMUI8peI_kEZMDImNHzpUf7Et3gfFZFDAsci0D0qjgmLOvte4K6tzh4tDWL18hSkJzbIJ6T5iNRTorzvn1JUXEuZEYkHQATMytXw&expires_in=3600&token_type=Bearer
This is a full JWT token which contains a header, payload and signature. Specifically this is a Cognito ID Token, as opposed to an Access Token or Refresh Token. It is encoded with the RS256 algorithm, however it can be easily decoded using jwt.io to see what information is contained inside.
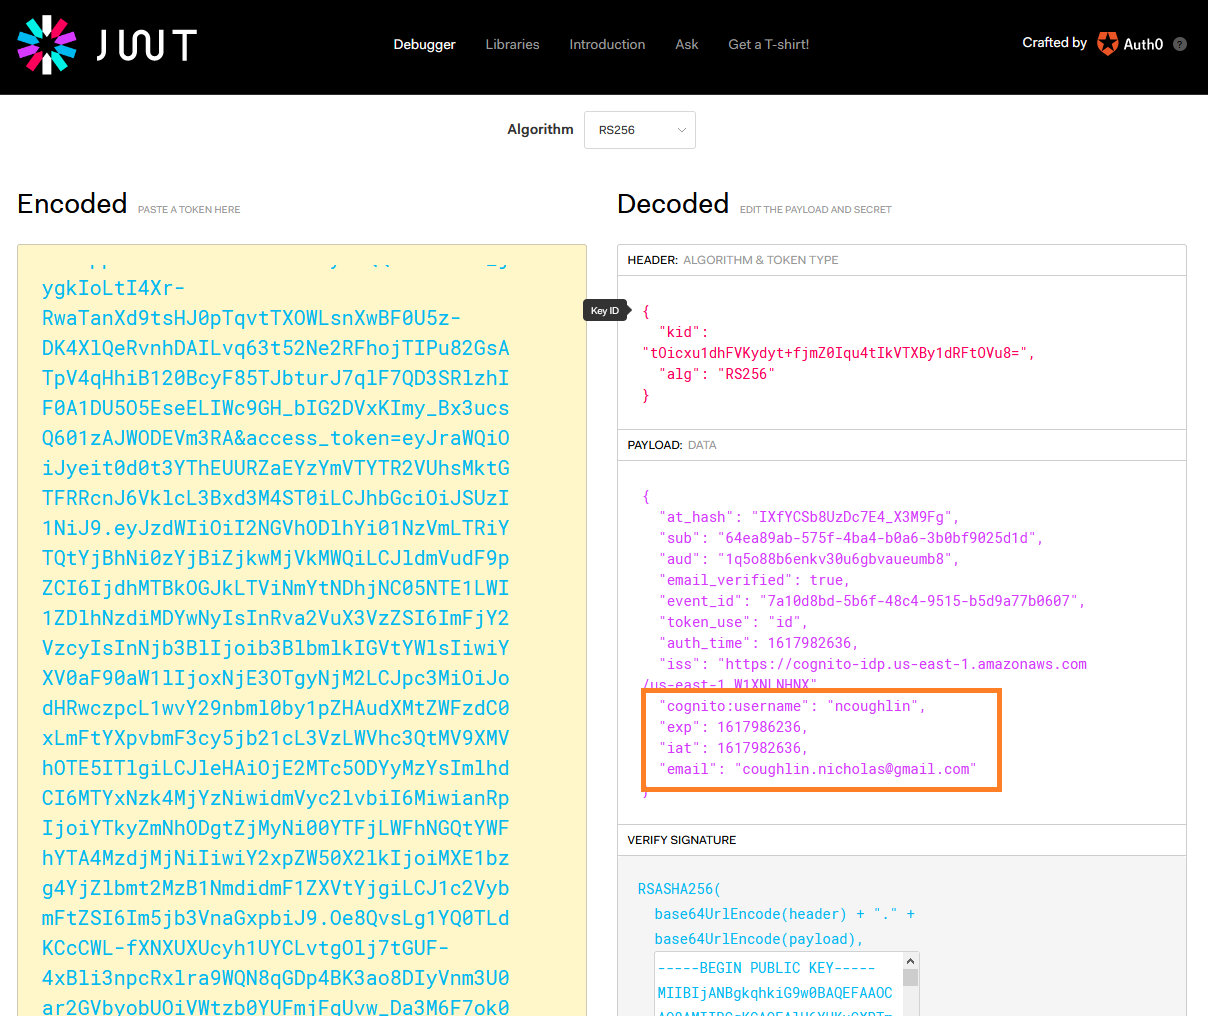
So as we can see, this information is not secure if it is intercepted.
If you are going to use the implicit grant method and get the full token back immediately, you must verify the signature of the token to ensure that it was actually issued from Cognito. This is a potential avenue of attack otherwise.
Therefore let us move forward taking the best practice approach, and work only with the code grant method.
Understanding the JWT Tokens
Let us be very clear at this point about an important concept. The Authorization Code itself cannot be exchanged for any useful information. The Authorization Code is how we get JWT Tokens. Cognito uses 3 different kinds of JWT Tokens, depending on what you need.
We saw an example of what a JWT Token looks like above. A request for Cognito JWT Tokens looks like this:
POST https://mydomain.auth.us-east-1.amazoncognito.com/oauth2/token&
Content-Type='application/x-www-form-urlencoded'&
Authorization=Basic aSdxd892iujendek328uedj

grant_type=authorization_code&
client_id=djc98u3jiedmi283eu928&
code=AUTHORIZATION_CODE&
redirect_uri=com.myclientapp://myclient/redirect
and the response looks like this
HTTP/1.1 200 OK
Content-Type: application/json

{
 "access_token":"eyJz9sdfsdfsdfsd",
 "refresh_token":"dn43ud8uj32nk2je",
 "id_token":"dmcxd329ujdmkemkd349r",
 "token_type":"Bearer",
 "expires_in":3600
}
And we can see the three tokens (Access, Refresh and ID) in that response. The actual tokens will be a much longer string, just like shown above.
So the flow is that the user logs in, we get a code, we exchange the code for tokens. Then we use the tokens to give us access to the Cognito API.
Exchanging Code for JWT Tokens
At this point we have received an Authorization Code (also referred to as OAuth Code) from the User Pool. This code, as shown above, is completely useless to us until we exchange it. However the user has been authenticated and a timed session has been started for this user. Cognito is ready for us to exchange this code for a set of JWT Tokens.
The exchange is made using an API call. Your method of making an API call will depend on your application. In this example we will start by making the call with Postman just to test it, and then we will create a call in a React application using Axios.
You will find documentation on how to format this API request here:
📘 AWS Cognito Docs: TOKEN Endpoint
another useful tutorial on this is available here:
📘 yippeecode.com: AWS Cognito Oauth 2 Authorization Code Flow
Exchange Code With Postman
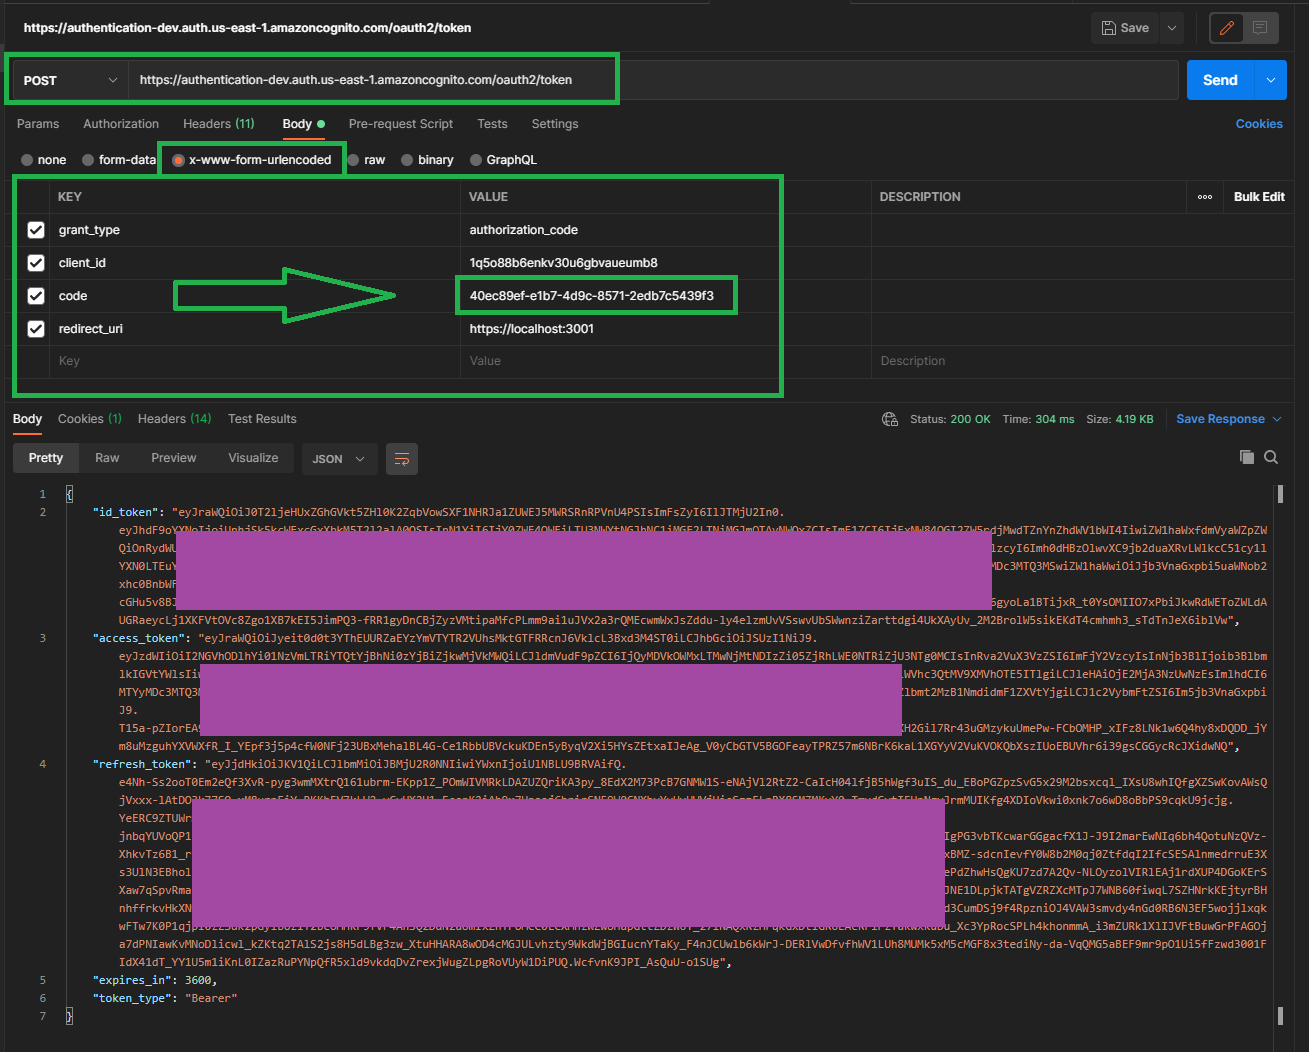
As shown in the documentation, we need to send the request to our token end point. Which is located in the Cognito UI under App integration > Domain name and then we append /oauth2/token so in my case the URL is
https://authentication-dev.auth.us-east-1.amazoncognito.com/oauth2/token
Of course you probably want to use a custom domain for your auth such as auth.widget.com/oauth2/token and to do that you need to follow the instructions in App integration > Domain name and Cognito Developer Guide: User Pools Custom Domain to create an alias in your Route53 records.
Then as you can see above we have included the correct grant_type and pasted in our code that we received in the URL, the redirect_uri as well as our client_id which is available in the Cognito UI App integration > App client settings . Also we have selected the x-www-form-urlencoded body type.
The key for the redirect url is
redirect_uriNOTredirect_url.
And we can see in the bottom of the screenshot that we have successfully received back our three JWT tokens. Success!
Exchange Code with Axios
One of the nice features of Postman is that once we have configured and tested our API call, it will auto-generate the code for you to make the same call in a variety of formats. Here we can see the auto-generated code to make the call with Axios in Node.
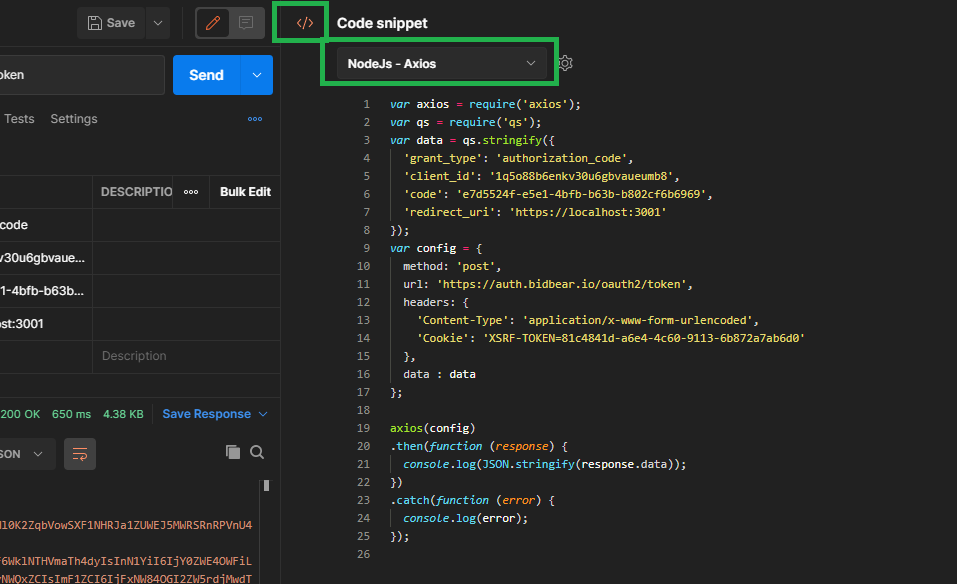
We can strip out the cookie header, Cognito does not require this. That gives us this.
var axios = require("axios")
var qs = require("qs")
var data = qs.stringify({
  grant_type: "authorization_code",
  client_id: "1q5o88b6enkv30u6gbvaueumb8",
  code: "e7d5524f-e5e1-4bfb-b63b-b802cf6b6969",
  redirect_uri: "https://localhost:3001",
})
var config = {
  method: "post",
  url: "https://auth.widget.io/oauth2/token",
  headers: {
    "Content-Type": "application/x-www-form-urlencoded",
  },
  data: data,
}

axios(config)
  .then(function (response) {
    console.log(JSON.stringify(response.data))
  })
  .catch(function (error) {
    console.log(error)
  })
Of course we need to change this code to dynamically pull the auth code out of the URL and insert it into the request as this will change every time a user logs in.
Let us keep going with this code example. We want to do the following:
- Extract Auth Code from URL
- Insert Auth Code into API request using Axios
- Submit JWT Token request
Extract Auth Code from URL
Let us create a function to pull the code from the URL parameter.
function cognitoExtractAuthCodeFromURL() {
  // retrieve cognito auth code from url parameters
  const queryString = window.location.search
  const urlParams = new URLSearchParams(queryString)
  const authCode = urlParams.get("code")

  console.log(`Auth Code: ${authCode}`)
  return authCode
}
And if we login we can see our console log with the correct auth code in the console. Step 1 complete.
Create Axios Request
Now we can create the Axios request which dynamically inserts our auth code that we retrieved. We are exporting this function as a utility function.
export const cognitoRetrieveJWTTokens = () => {
  let code = cognitoExtractAuthCodeFromURL()

  var axios = require("axios")
  var qs = require("qs")
  var data = qs.stringify({
    grant_type: "authorization_code",
    client_id: "1q5o88b6enkv30u6gbvaueumb8",
    code: `${code}`,
    redirect_uri: "https://localhost:3001",
  })
  var config = {
    method: "post",
    url: "https://auth.bidbear.io/oauth2/token",
    headers: {
      "Content-Type": "application/x-www-form-urlencoded",
    },
    data: data,
  }

  /* debug */
  console.log(data)

  axios(config)
    .then(function (response) {
      console.log(JSON.stringify(response.data))
    })
    .catch(function (error) {
      console.log(error)
    })
}
and then we merely need to import and call our utility function into one of our components. Let's put it in the Header.
import React, { Component } from "react";
import { cognitoRetrieveJWTTokens } from "./utils.js"; // highlight-line


class Header extends Component {
  render() {

    cognitoRetrieveJWTTokens(); // highlight-line

    return (
     ...
    );
  }
}

export default Header;
and I can successfully see my three JWT tokens logged in the console.
Next Steps
The next steps will depend on your application and this post is getting long, but once you have the JWT Tokens some next steps could be:
- Decode and verify the
id_tokento get the users information - Clear the auth code from the URL (it is now expired and we like things tidy)
- Use the
access_tokenfor addition Cognito actions or API calls. - If using Redux put these tokens in the store
- Use these methods to create custom login form instead of hosted UI
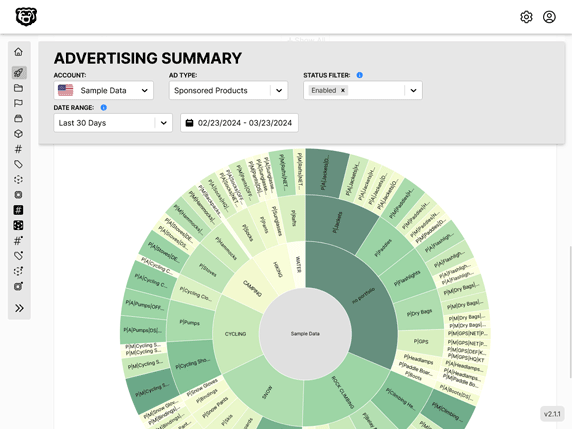
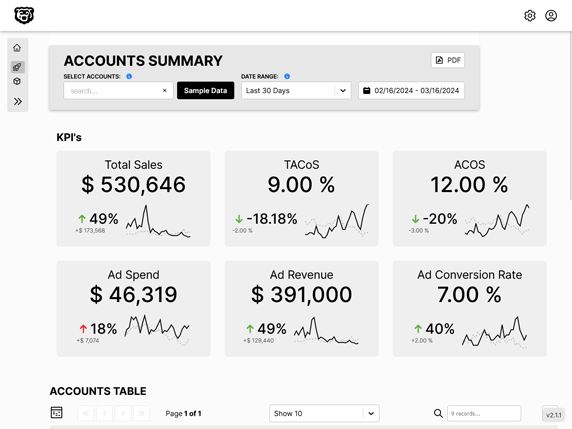
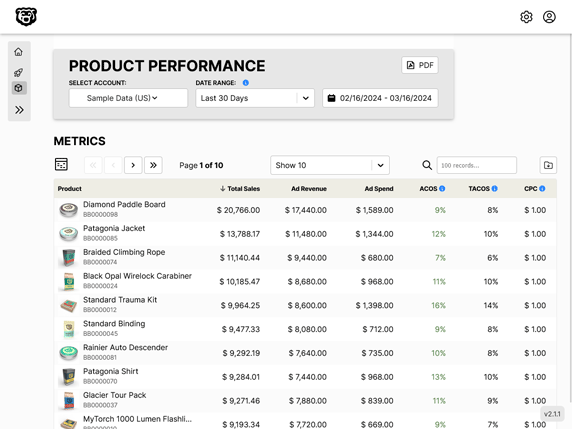
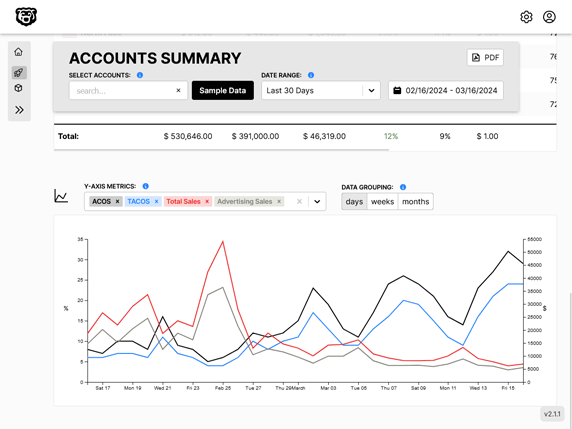
Automated Amazon Reports
Automatically download Amazon Seller and Advertising reports to a private database. View beautiful, on demand, exportable performance reports.