Photoshop: Hue Adjustment Methods
Method 1: Hue/Saturation Adjustment Layers
I learned this method from Steve Smith so props to him for this one. This method is great if you want to remove a specific range of color (or just tone it down) for the whole photo.
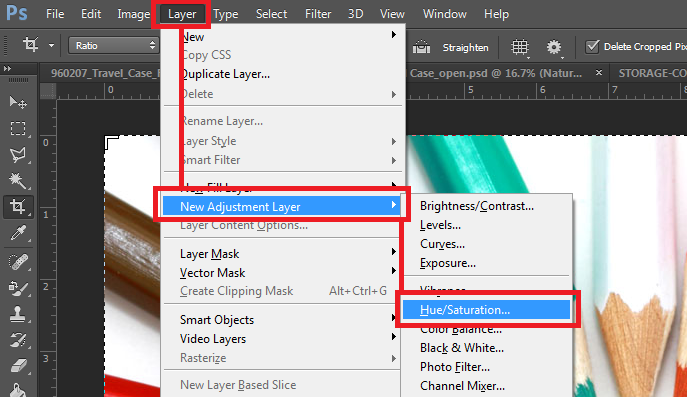
Start by creating a new hue/saturation adjustment layer by going to Layer>New Adjustment Layer>Hue/Saturation
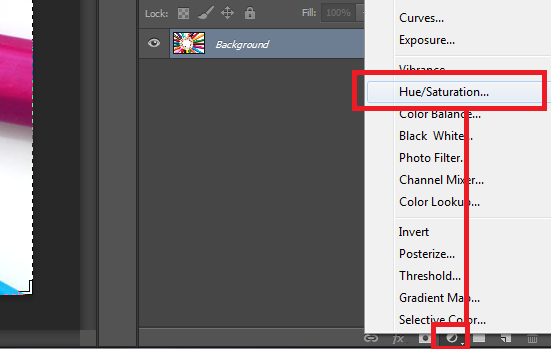
This can also be found at the bottom of your layers panel:
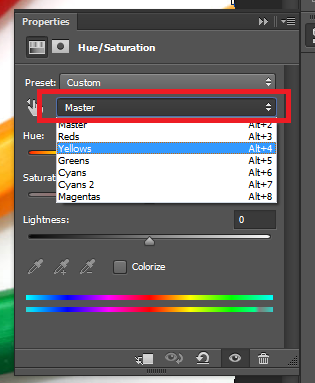
You will see the following panel open up. Start by selecting a base color range from the dropdown.
In this sample we are going to select a range of blue, and then turn the saturation down all the way. This should have the effect of turning all the blues in that hue range gray. Remember you could also turn up the saturation to make that specific hue very bright.
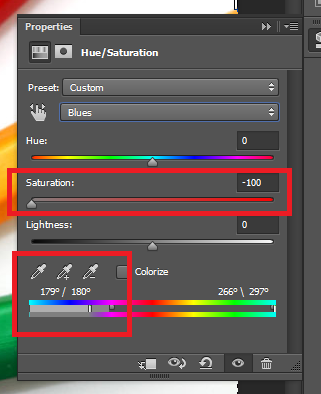
We are selecting a range of blue and then turning down the saturation on that range.
The blue pencil has now been de-saturated to gray.
In addition to adjusting saturation, you can also change the hue of the specific range you have selected AKA change the color, by selecting a range of color and then adjusting the hue slider.
That wraps up method 1, which is useful for adjusting the whole image at once. Now lets take a look at a little more focused method.
Method 2: Color Adjustment Brush
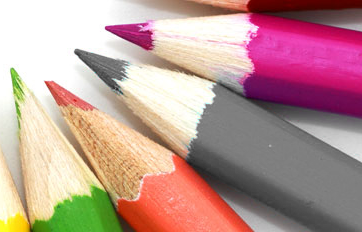
If you look back at our colored pencil image at the top of the page, you will notice that we have several red pencils. What if I want to change the color of just one of those pencils and not the others? I could create multiple layers, make a mask or copy a selection with the lasso. But there is an easier way. The color adjustment brush.
Go over to your tools panel, then click and hold down on the brush. You will several brush tools, one of which is the “Color Replacement Tool”. Select this tool.
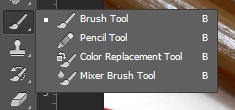
The color replacement tool is under the brush tool in the tools panel.
Next select two colors for your foreground and background colors. The foreground color is the color you want it to be, the background color should be the color you want to change. You can select these colors with the eyedropper.
Then you will want to make sure “Color” is selected under the mode, and adjust your tolerance to a desired level. Increased tolerance will paint over a wider range of similar colors, so increase the tolerance if it isn’t changing as much red as you want. Select “Color” mode and adjust tolerance.
And here we can see the effect we have on the red pencil with this brush. The really convenient thing about this method is that it won’t touch color outside of your tolerance, so it will sweep right over all other colors without touching them.
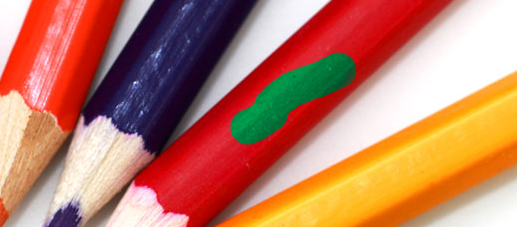
This method is great for making targeted adjustments, and doesn’t require making any additional layers to manage. You can make a selection (using any method) and then color it in with a brush using this method.
Method 3: Select Color Range
Selecting a color range will let you make a selection based on the hue, and that selection can then be modified with either of the first two methods. Start by going to Select>Color Range.
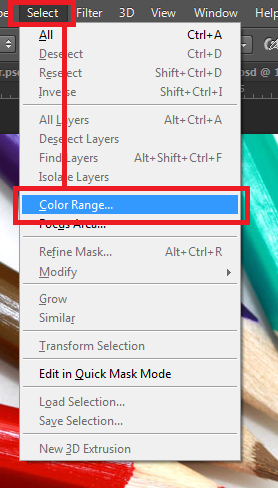
You will be given an eyedropper and then select a color. Increasing the “fuzziness” is basically the tolerance. Increasing it will select more and more similar colors. Here I have selected all the green pencils with just one click.
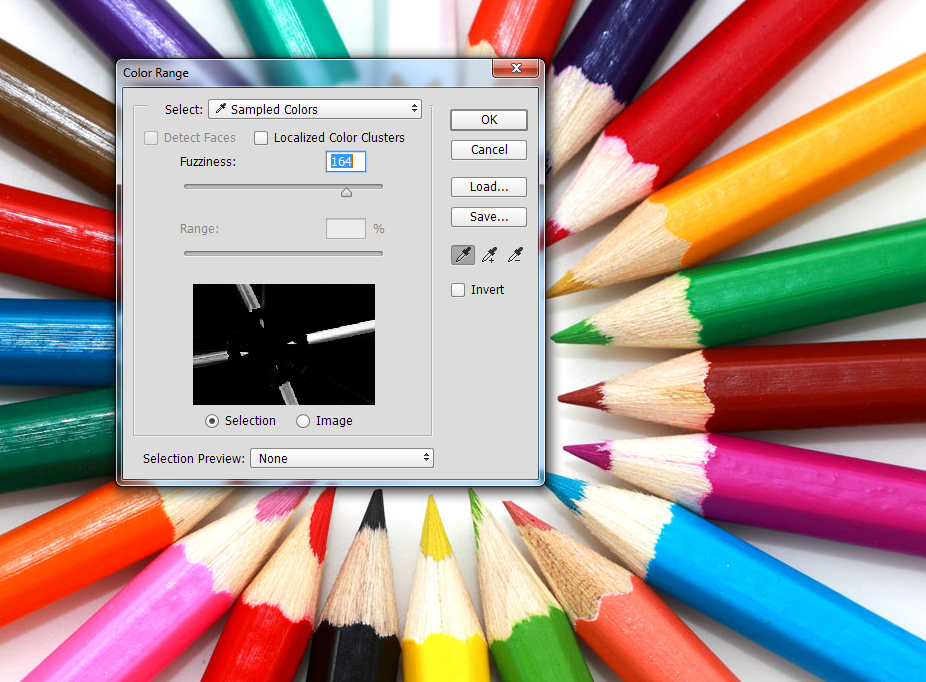
We have selected the green pencils.
Also notice the droppers with the plus and minus signs on them. They will let you add or subtract other colors from the selection. Once the selection has been made, it will act like any other selection in Photoshop, allowing you to modify just the portions of the image that have been selected. From there you can use a hue/saturation adjustment layer, or the color replacement brush from the previous two methods
Don’t forget that if your selection isn’t exactly what you want, you can subtract from a selection by pulling out the lasso and holding the ALT key while you click. This is extremely useful.
Comments
Recent Work
Basalt
basalt.softwareFree desktop AI Chat client, designed for developers and businesses. Unlocks advanced model settings only available in the API. Includes quality of life features like custom syntax highlighting.
BidBear
bidbear.ioBidbear is a report automation tool. It downloads Amazon Seller and Advertising reports, daily, to a private database. It then merges and formats the data into beautiful, on demand, exportable performance reports.