AWS API Gateway Intro
Intro
API Gateway is a serverless API builder, typically used in conjunction with AWS Lambda, and which would be used to replace something like an Express REST API on Node. To read more about where API Gateway would fit into a serverless application architecture read my post here:
🔗 Ncoughlin: AWS Serverless Application Architecture
Pricing is outrageously reasonable as well. Once you get past the free tier you are only looking at $1 USD per million API calls.
Additional Resources
🔗 AWS: API Gateway Developer Documentation
This post also assumes you are familiar with
Dashboard Overview
Here is a quick preview of what your dashboard will look like inside Amazon API Gateway after you have logged into AWS and created/named your first API.
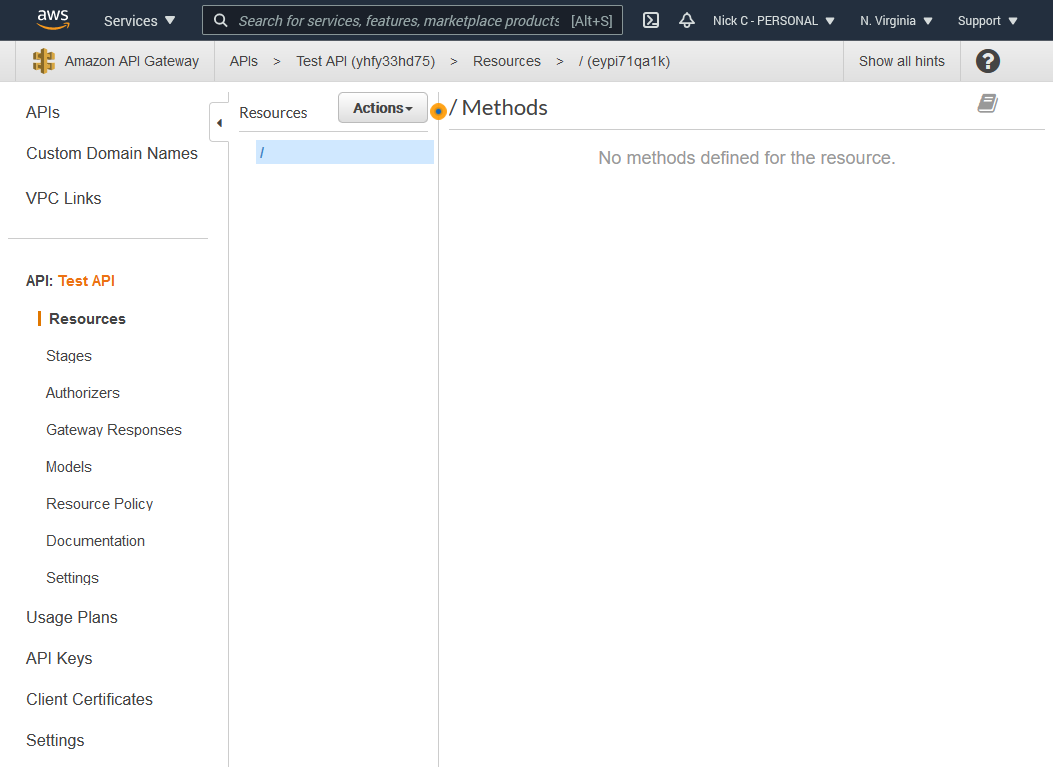
Let's briefly outline the items in the menu here that aren't related to making the actual API itself, just to get them out of the way.
API Keys
The API Keys section only exists to give outside developers or applications access to your API, just like you would get an API key to Google Maps or another service. If your application is the only one that will have access to this API you can ignore this section entirely. Which is what we are going to do for now.
Custom Domain Names
Another easy one is the custom Domain Names section. This is where you assign a custom domain name to your API, such as api.myapp.com.
Client Certificates
Forwarding incoming requests to another http endpoint, and on the other https endpoint you want to validate the request stems from your API gateway API. The certificates allow you to validate that the traffic is coming from a valid source.
Settings
Settings currently just lets you provide a CloudWatch ARN role so that you can monitor your API usage in CloudWatch.
API
Resources
This is where the routes (resources) and actions (methods) of your API are defined. We click on the Actions button to create a new item. We can start by creating a couple of test routes, which are called resources.
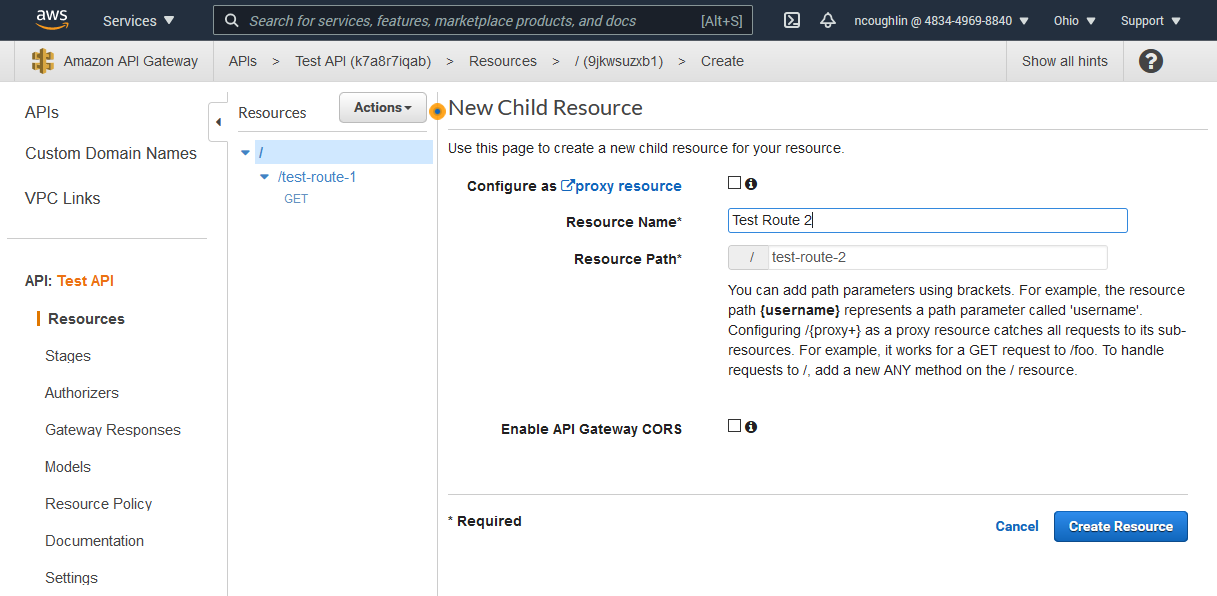

And then once the resource has been created, we define a method on that route (GET/POST etc).

And then the real magic happens when you get to choose your integration point.
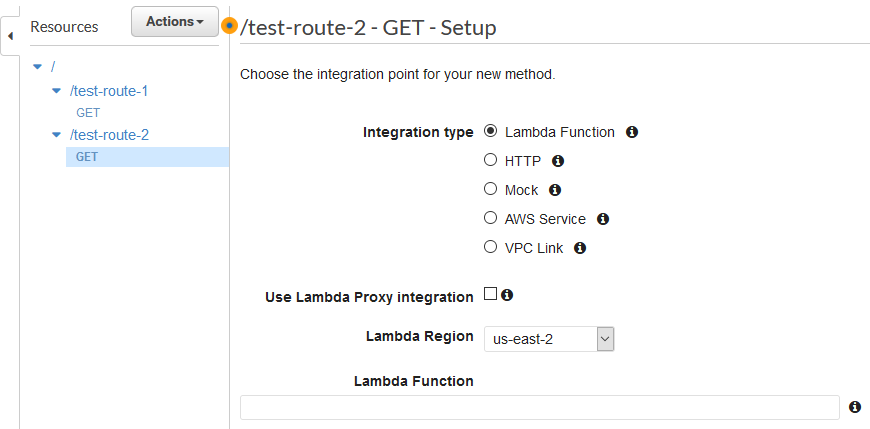
We can start to see now why this service is so useful. If we are building our application in the AWS environment we can integrate directly with Lambda or other AWS services, as well as integrate authentication with Cognito. For now let us just choose Mock which will generate a mock response for us as we go through this learning process.
And then we can see that we get this awesome visual map our route, where we can make changes to any individual stage of the route.
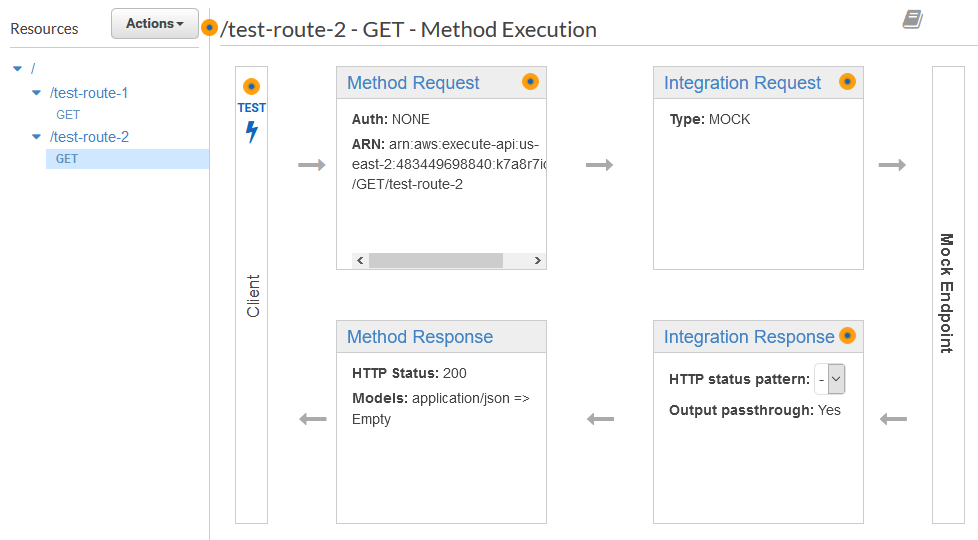
We will go over the different sections of this resource map more below.
Stages
When you deploy the changes you have made to your API will have to choose a stage to deploy to. This is just like the stages of a server (dev, test, live).
Authorizers
This allows you to add authentication to your API.
Models
Models let you define the shape of your data by creating schemas, similar to a Mongoose Schema, however these models are defined with JSON. You can use these models to validate incoming data and make sure that it fits your schemas.
Documentation
Documentation is important if you intent to expose your API to other developers. It will tell them what to send and what to expect back as a response on your routes.
Resource Map
We will now go over the various options that are available to us on a resource by exploring the 4 sections of a resource shown in the resource map.
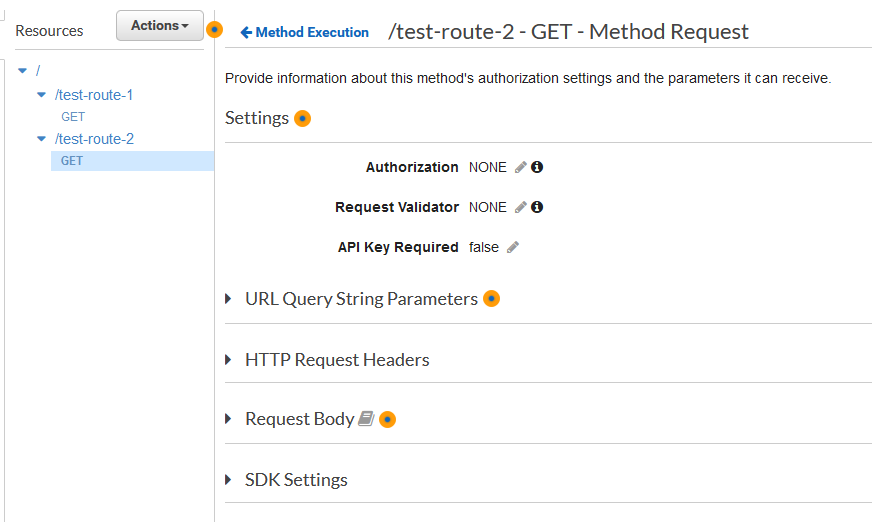
Method Request
This is where we define what requests reaching this endpoint should actually look like. We can make sure that incoming data fits a data schema, that the request is coming from an authorized user, and even check for an API key.
Integration Request
Here we map incoming data into the shape we want to use it on the action we are about to trigger.
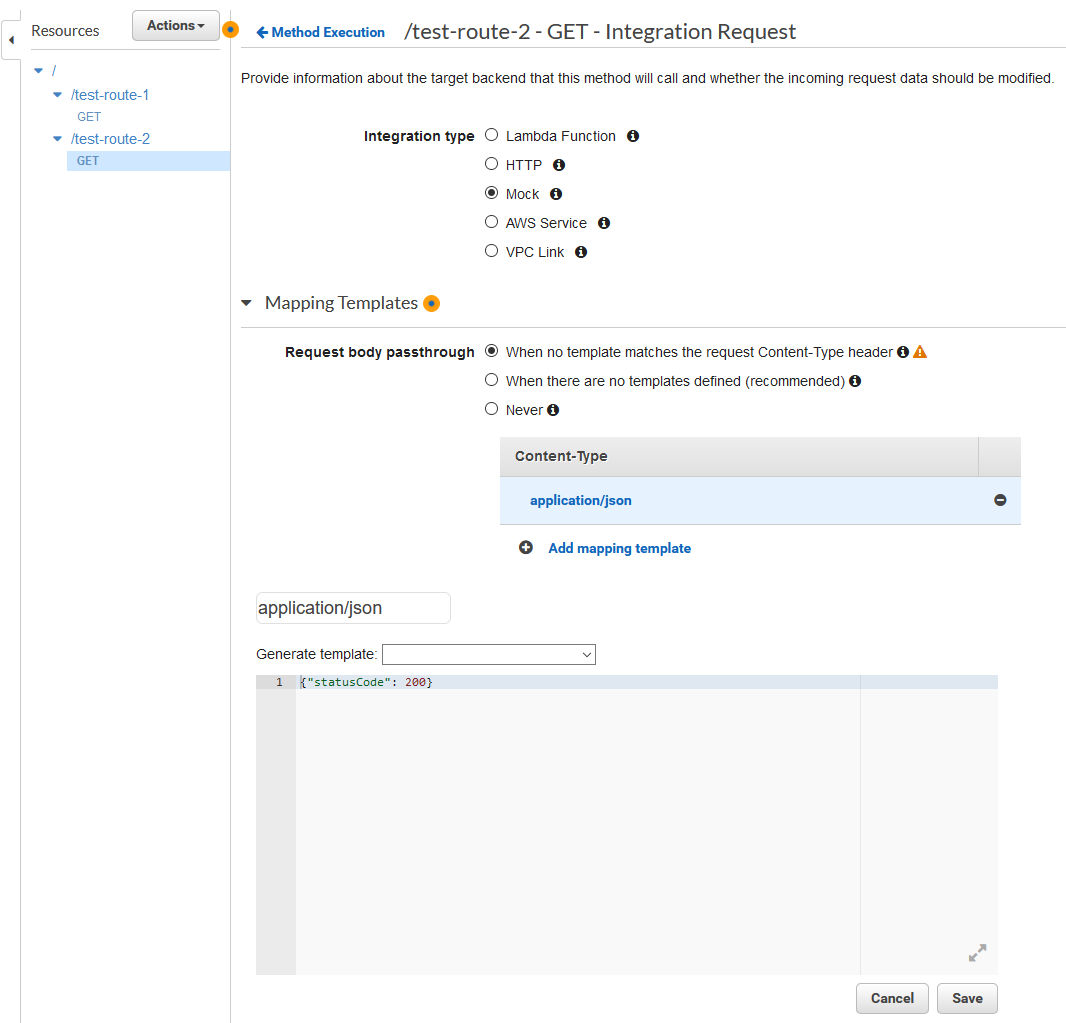
Because we are using a mock endpoint right now we will not do anything here, but we will come back to this later.
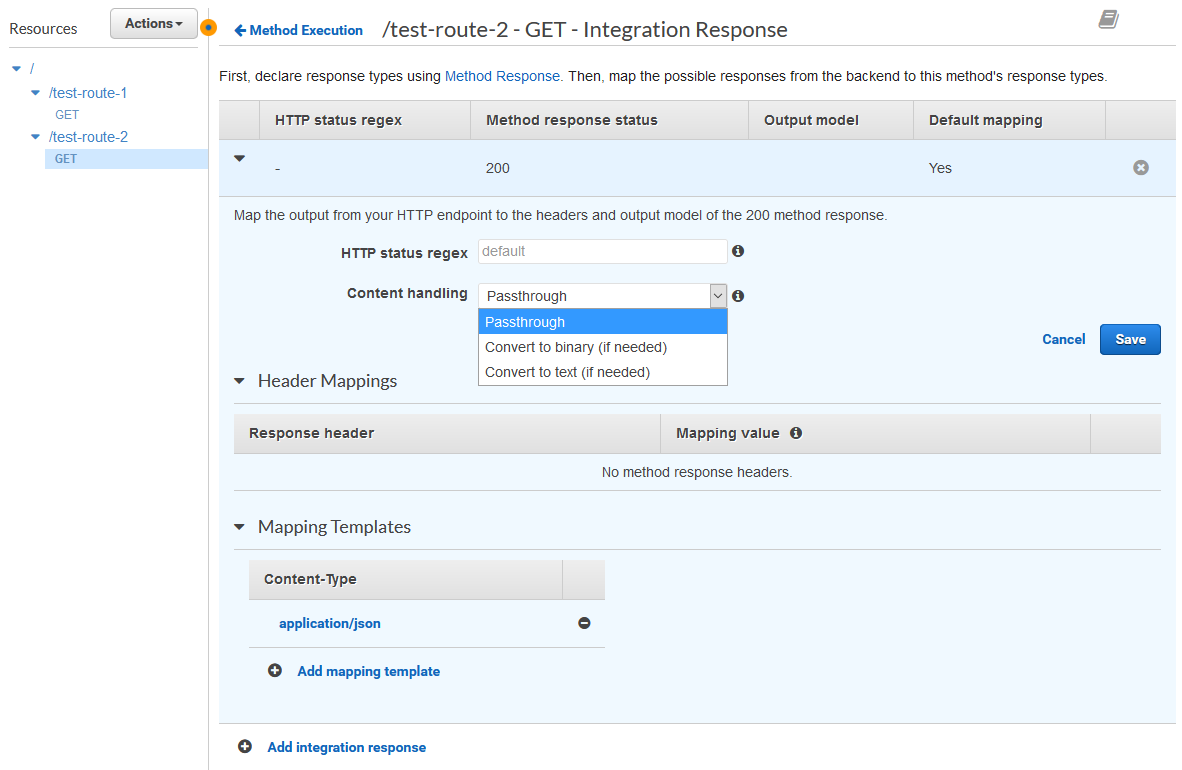
Integration Response
The first thing that gets triggered as soon as our action is done. For example later when we are using Lambda as our endpoint we would receive back some data here, which would be the result of our calculation (or whatever). This is also the place where we would configure that response.
Method Response
The last step before our client receives the response, the Method Response is where we shape the response being returned with another schema.
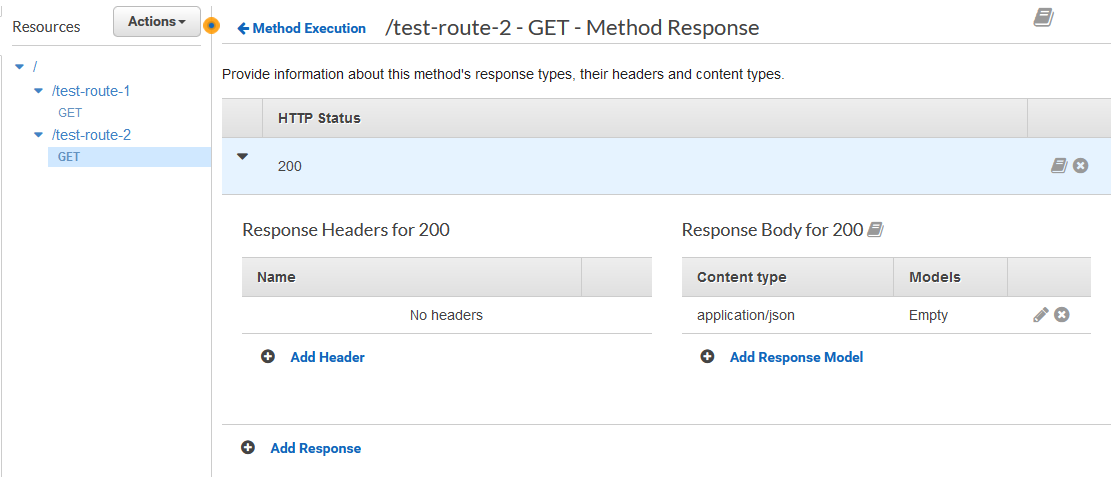
Method Response is where we define the name of our Response Headers, and then Integration Response is where those headers are given life (data).
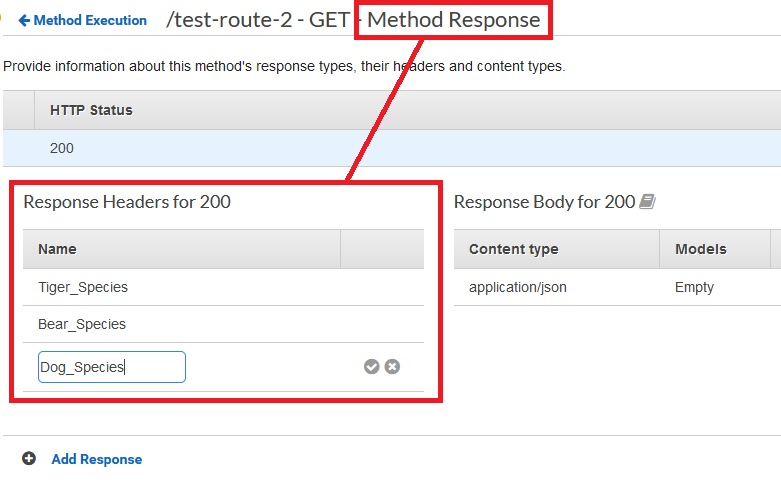
We create the response headers in Method Response
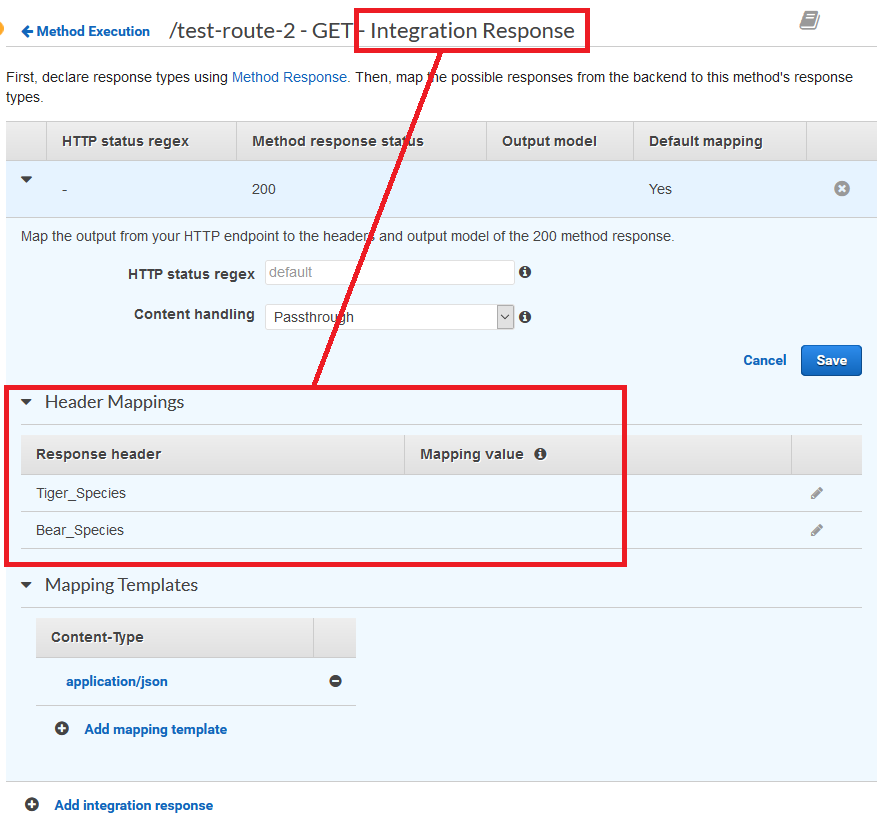
And then map to the headers in Integration Response
This is the basic cycle of a method (GET/POST) on a resource (route).
Testing
Let us assume that you have made a simple function in Lambda.
And also that you have selected that Lambda function in Integration Request > Integration Type. There is an easy way to test this route without sending an actual request.

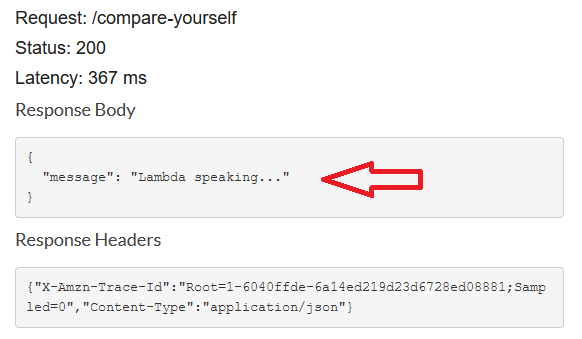
Select test and then you will be given some additional options. If you needed to send a specific type of data under a header you could specify that here, or in our case you can simply send a blank request by hitting test without entering anything.

And we can see that we get a status 200 code and our text back that set in the above linked example. Great!
Automated Amazon Reports
Automatically download Amazon Seller and Advertising reports to a private database. View beautiful, on demand, exportable performance reports.